How To Build A Coop Light
A Coop light is really just a big wood box with a reflective surface in the interior and some sockets for the bulbs that you are going to use. It can be hung from the rafters of a lighting grid with sash cord or mounted on a light stand. The idea is to create soft light for a flat even lighting effect.
The one I built was made out of 1x4 and 1x2 pieces and will have two gangs of two lights, each controled by a seperate dimmer switch. The cost of building this one not including bulbs was about 90 bucks.
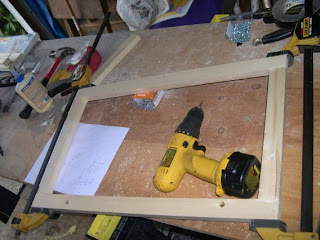
After I cut the main frame pieces I laid them out to make sure they were of the correct size. This box will be 2' by 4'.

The joints are all butt joints but I added dowels for added strenght and used angle and T brackets for added strength. In order to make sure the dowel holes lined up I had to build this Jig pictured.

I then had to clamp the jig to the cut stock and simply drilled the holes. Note I had to take care when drilling the opposite side so that the holes would all line up correctly. It worked out pretty well and though it did not turn out furniture perfect it was good enough for the job at hand

After all the holes are drilled and checked I began the assembly. I started with the two middle pieces. Wood glue and clamped them real tight. I was then able to mount the T brackets with screws.

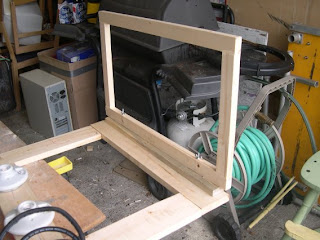
After the middle pieces dried I repeated the outer joints and below is the finished main part of the light.

The next step is to assemble the side pieces out of 1X2. This is one of the end pieces and it is built so that it will all fit together and be about 15 inches deep

I did not use the dowel gag here as these were small and glue and brackes will be sufficient to hold it all together.
While these pieces were drying I went ahead and started the wiring if the light

As you can see in the picture I got a couple of boxes to hold the dimmer switches.
The power cable is of the same material they use for stingers and I used 12 guage romax for the wiring. Each gang is wired in parallel and while doing the wiring make sure you test with a continuity tester at each step checking the ground, hot and neutral are not shorted and the circuits work. Note that the hot (black) wires are wired though the dimmers and the continuity check will not work form the plug but up stream is fine.
To supply the ceramic fixtures I made a pig tail for the first one and wired directly into the second in each gang. The ends of the pigtails are pushed

through the center holes and then wired into the ground and the fixtures.

Like so

Then wire the ends into the fixtures. Make sure to put the hot to the hot screw and the neutral to the neutral screw.

This is what the setup looked like after I finished wiring it all up

And this is a test. Worked first time. Note that these are just 60 watt bulbs I had laying around the house.

After that was completed the next step was to mount the sides. My original intent was to use hinges and allow it to fold up on itself but after getting the parts assembled I found that that would not work as cleanly as I would have liked. So I changed my mind and decied to use 3 inch machine screws with wing nuts.

This is one of the end sides. I also had to use a screw/nut configuration to hold the sides together at the tops as well. I am glad that I did not toss out the jig cause it came in handy making the holes. Note that I also had to use a 1x2 at the bottom of the end sides to get them to line up with the long sides. This was due to my plan to use hinges and I had already cut the material before I changed my mind. I had to counter sink the screws/wing nuts for those sides so that there was clearance to attach the wing nuts.

And this is the light assembled.

The last step was to line the bottom and sides with foam core. It took less then a full 4'x8' sheet of foam core I got at a local framing shop and I had enough left over for a decent sized bounce card.
This is the finished light.

And a test using the 60 watt bulbs.

Finally it breaks down and stacks up nicely

All in all it was a pretty sucessfull project. I had to send away for the actual photo floods from Lights On Retail which is a film supply house and I got 4 500 watt, 4 250 watt a roll of gaff tape and a replacement bulb for one of my 650s for only 60 bucks which I thought was a pretty good deal.
Once I loaded up the 500 watts I tested the amperage and it looks to draw about 15 amps with both gangs full one. At 7 feet it kicks out about 130 candles dropping down to about 60 at about 12 feet. Inverse Square Law and all that. Not bad.
I also found the 500 watt bulbs (Sylvania) tended to buzz annoyingly so that will be an issue when the coop is used, but I'll figure it out.
Labels: Coop light, Home built, Lighing

